The full walkthrough · every number on this page was measured on real footage

Two cameras in.
One master out.

This is how FullField Stitch actually works — the rig, the recording settings that make stitching easy, the seven-step wizard, and an honest look at the seam. Works with DJI, GoPro, Insta360, or any two matching action cameras.

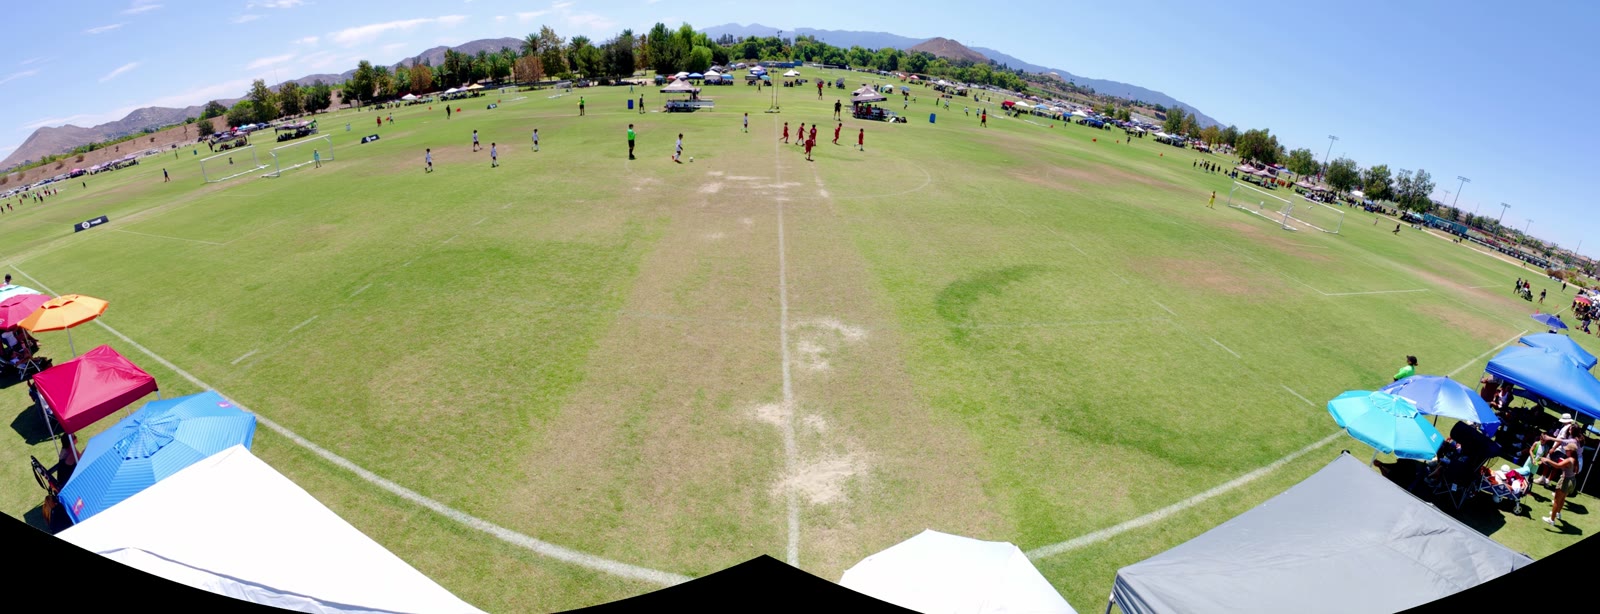
A full stitched panorama of a soccer field, produced from two overlapping camera recordings

An actual export — one continuous panorama assembled from two overlapping recordings of the same field.

The rig

The reference setup this walkthrough was shot on — deliberately unglamorous, because the software is what does the heavy lifting. Any pair of matching action cameras on a tall mount works the same way.

What’s on the pole

  • A Veo 17 ft tripod — height flattens the perspective and lifts the view over players and parents on the touchline
  • Two DJI Osmo Action 5 Pro bodies, angled to cover one half of the field each, with about 50% overlap between the views
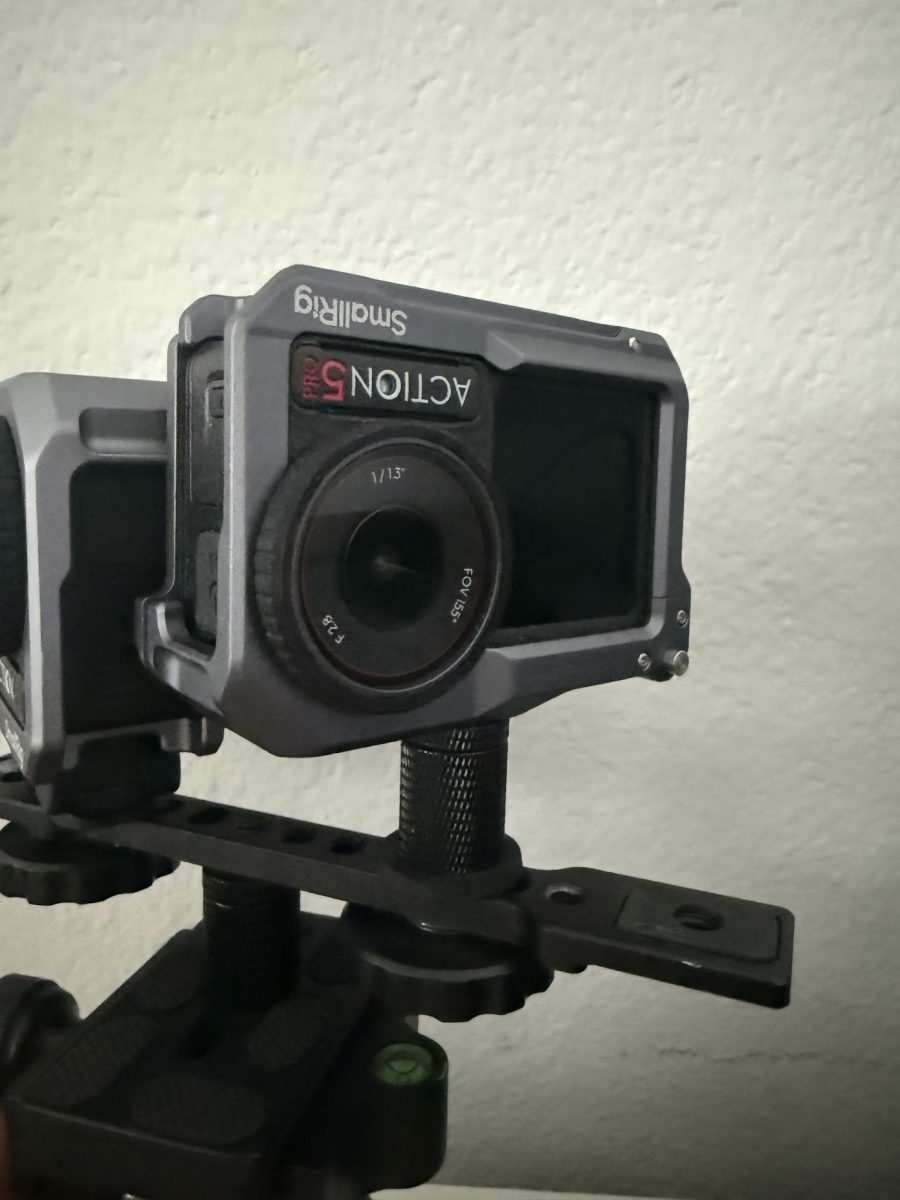
  • One camera mounted upside down — with one body flipped, the two lenses sit as close together as physically possible; the app has per-camera upside-down flags, so the footage just works

Why lens distance is the whole game

Two cameras never see the scene from exactly the same point, and the gap between the lenses is what creates parallax — the one seam error software cannot fully remove (measured below, honestly). Every centimeter you close between the lenses shrinks it at the source.

That’s the entire reason one camera rides upside down: it lets the two lens centers nearly touch. Everything else on this page is easier because of that one mounting decision.

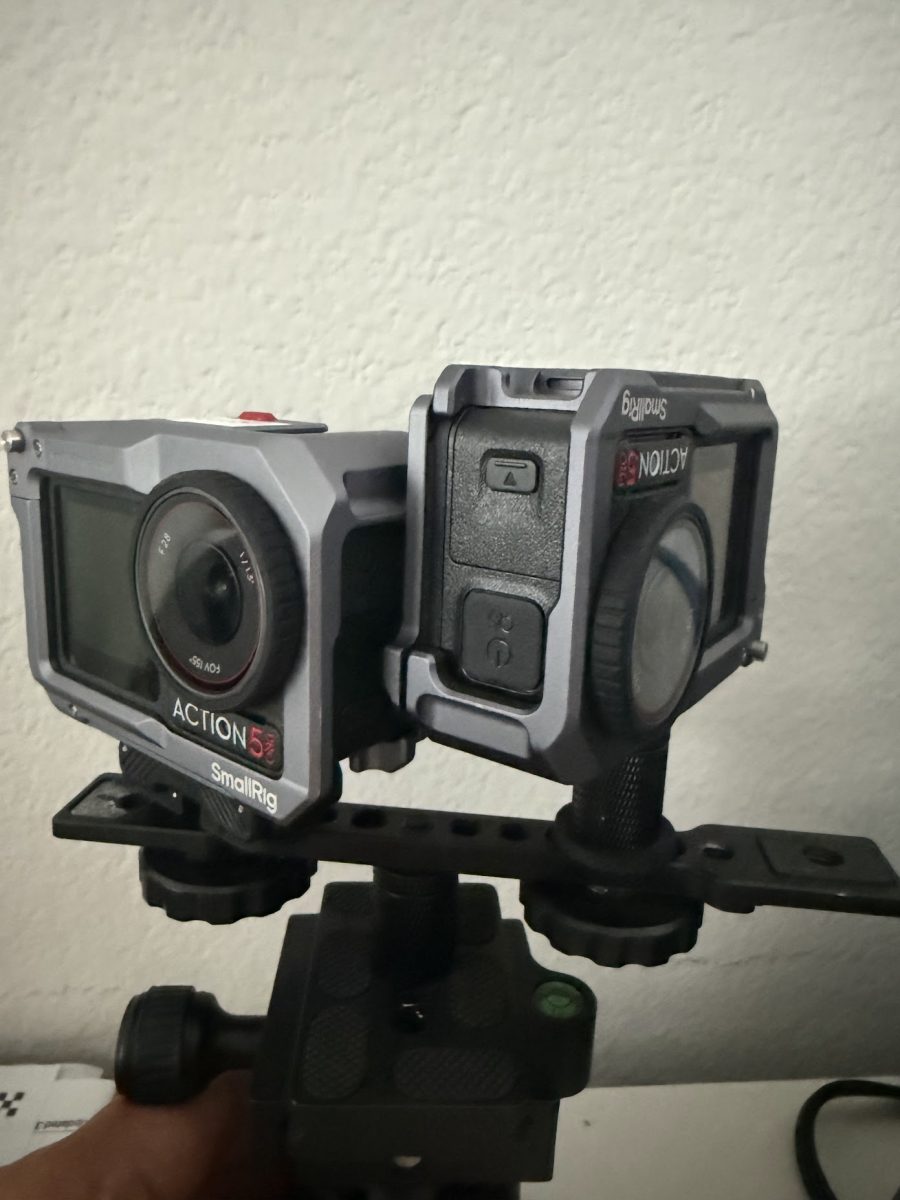
Two DJI Osmo Action 5 Pro cameras in SmallRig cages on a small dual-mount bar, one camera mounted upside down, with a bubble level on the mount below
The whole rig: two cage-mounted bodies on an off-the-shelf dual bar, angled apart so each covers one half of the field.
Close-up of the second camera riding upside down in its cage, its lens almost touching the first camera
The one clever part: the second body rides upside down, which puts the two lens centers as close together as the hardware allows.
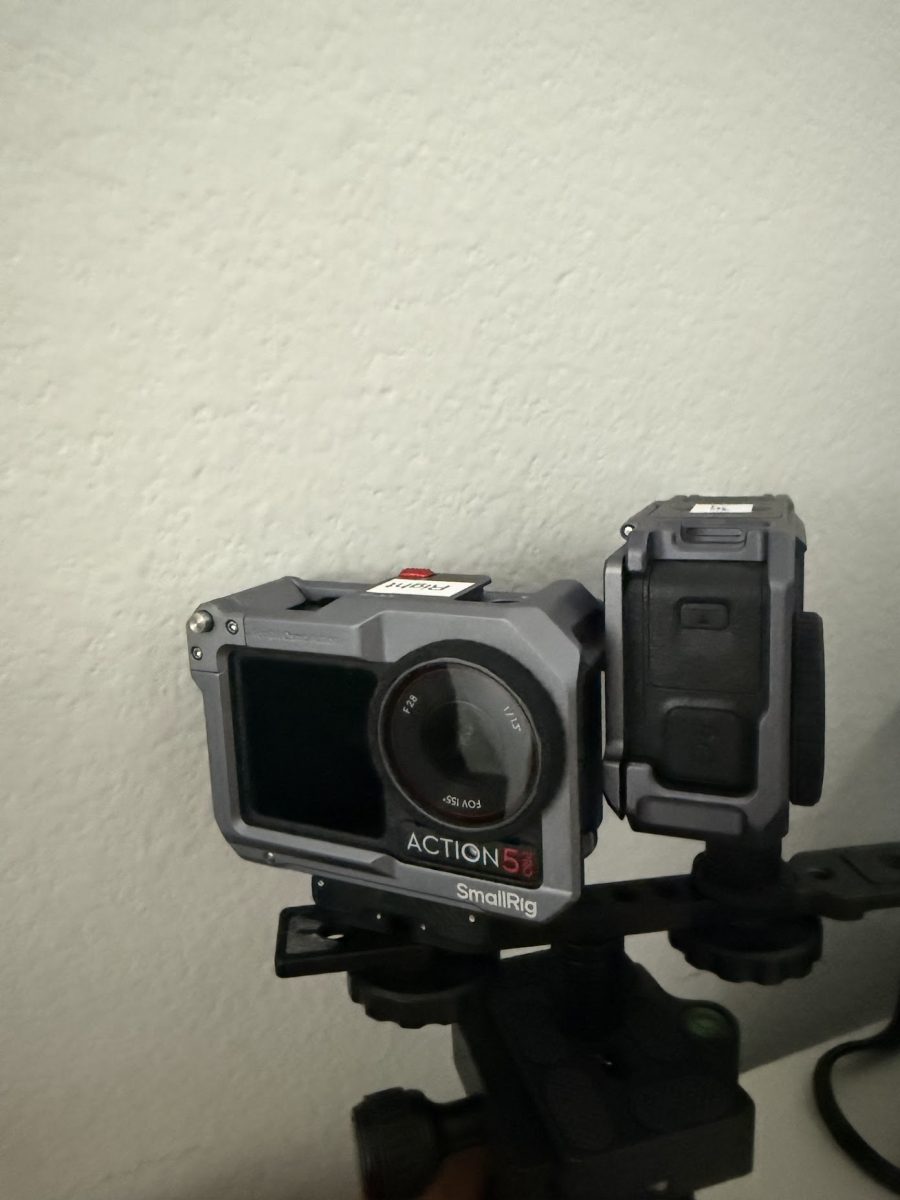
Front view of the camera pair with a piece of tape labeled Right stuck on the first camera
Taped-on labels and all. This exact makeshift setup shot the footage behind every measurement on this page.

Record it right

Ten minutes of camera setup buys you a clean stitch. This checklist isn’t folklore — each item was tested on real footage, and the figures quoted are what was actually measured.

  • Dewarp / linear FOV: ON. Straight lines stay straight, so the stitch geometry doesn’t have to undo fisheye first.
  • Stabilization (EIS / RockSteady): OFF. Stabilization re-warps every frame and slowly breaks a fixed alignment. With it off, alignment drifted just 1.45 px over 50 s — effectively rock solid.
  • 4K at 59.94 fps, both bodies. Matching frame rates keep the two clips in lockstep; the export drops frames on timestamps and never blends them.
  • Lock a fast shutter — around 1/240 in daylight. Motion blur comes from shutter speed, not frame rate. A fast locked shutter keeps players and ball sharp in every frame.
  • Max out the bitrate. The reference footage measured ~109 Mbps HEVC 10-bit — you’re making a master, so keep every bit the camera will give you.
  • Lock exposure, white balance, and ISO — identical settings on both bodies. Auto exposure drifts independently per camera, and the seam shows every mismatch.
  • Clock-sync both cameras from your phone (DJI Mimo, GoPro Quik). The app reads the timecode delta between the files and uses it to seed audio/video sync.
  • Clap or whistle in front of both cameras at the start. The audio spike is the sync fallback — and the verification that the timecode agrees.

Seven steps, one wizard

The app walks you through the whole pipeline in order. These are screenshots of the current build, not mockups.

1

Load Clips

Pick the two camera files. The metadata panel confirms both clips match — resolution, frame rate, codec — and a colour-profile readout flags flat footage (“Source looks flat — Flat → Rec.709 recommended”) so the right LUT is queued up before you ever see a washed-out export. If one camera rode upside down, tick its flip flag here.
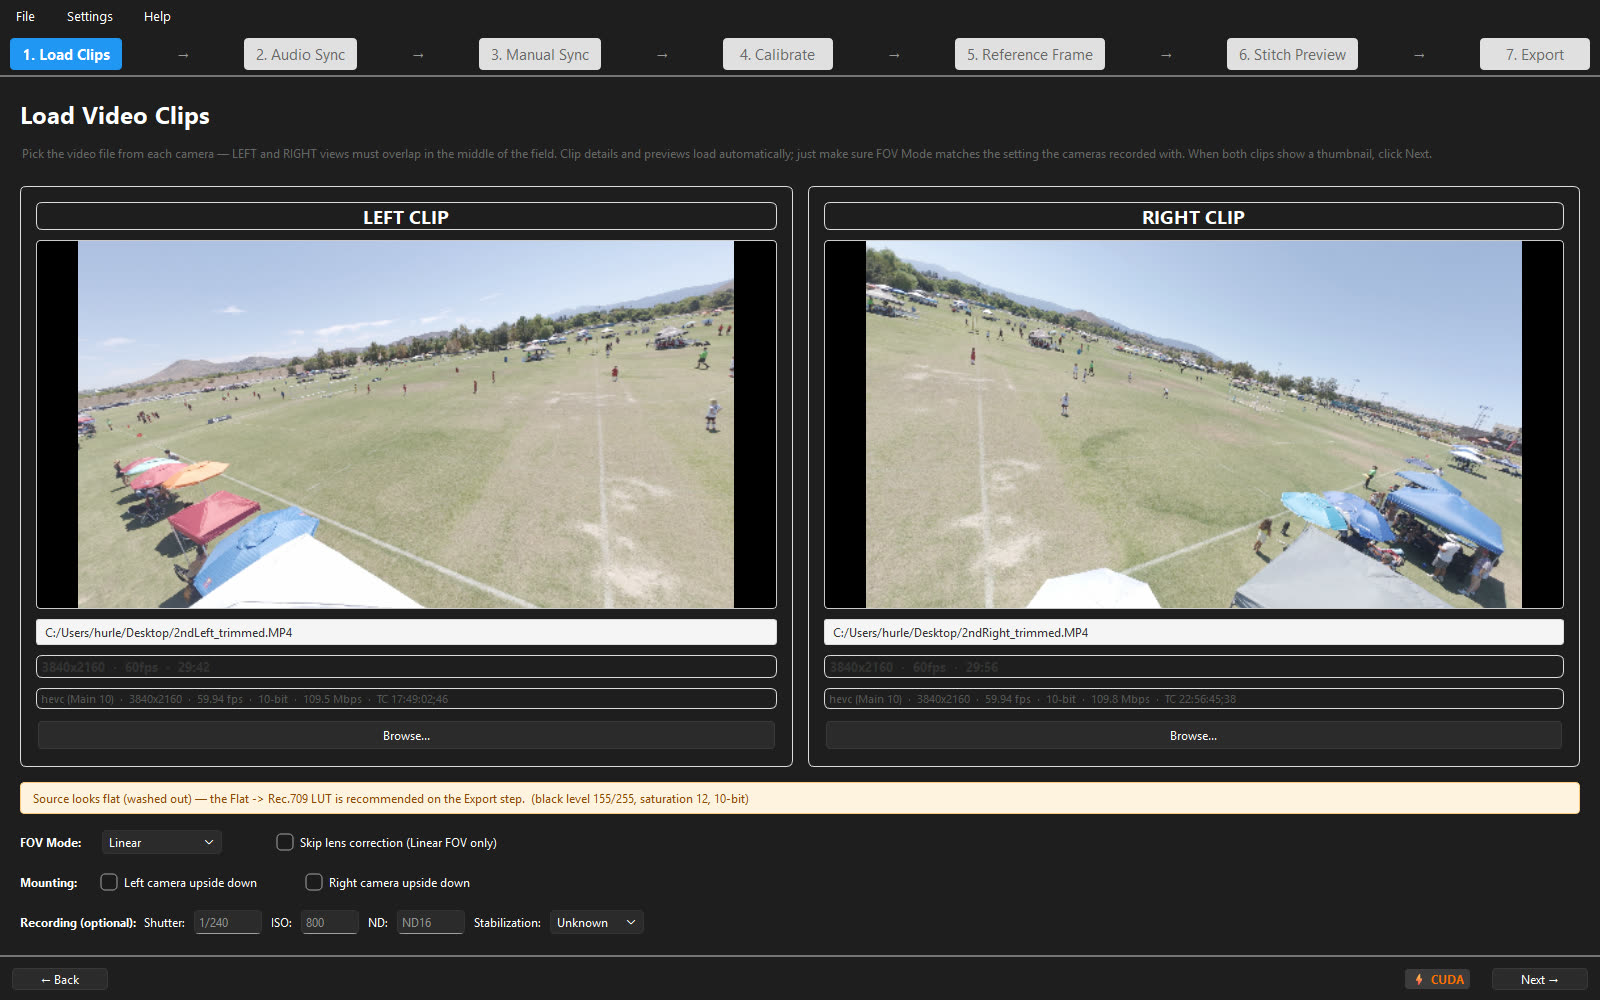
Load Clips step: two camera files loaded, with a metadata panel and a colour-profile recommendation
2

Audio Sync

The app finds your clap in both audio tracks and computes the offset between the recordings. For clock-synced rigs it also shows the timecode delta, with an agreement readout in frames — when the clap and the clocks agree, you know the sync is right.
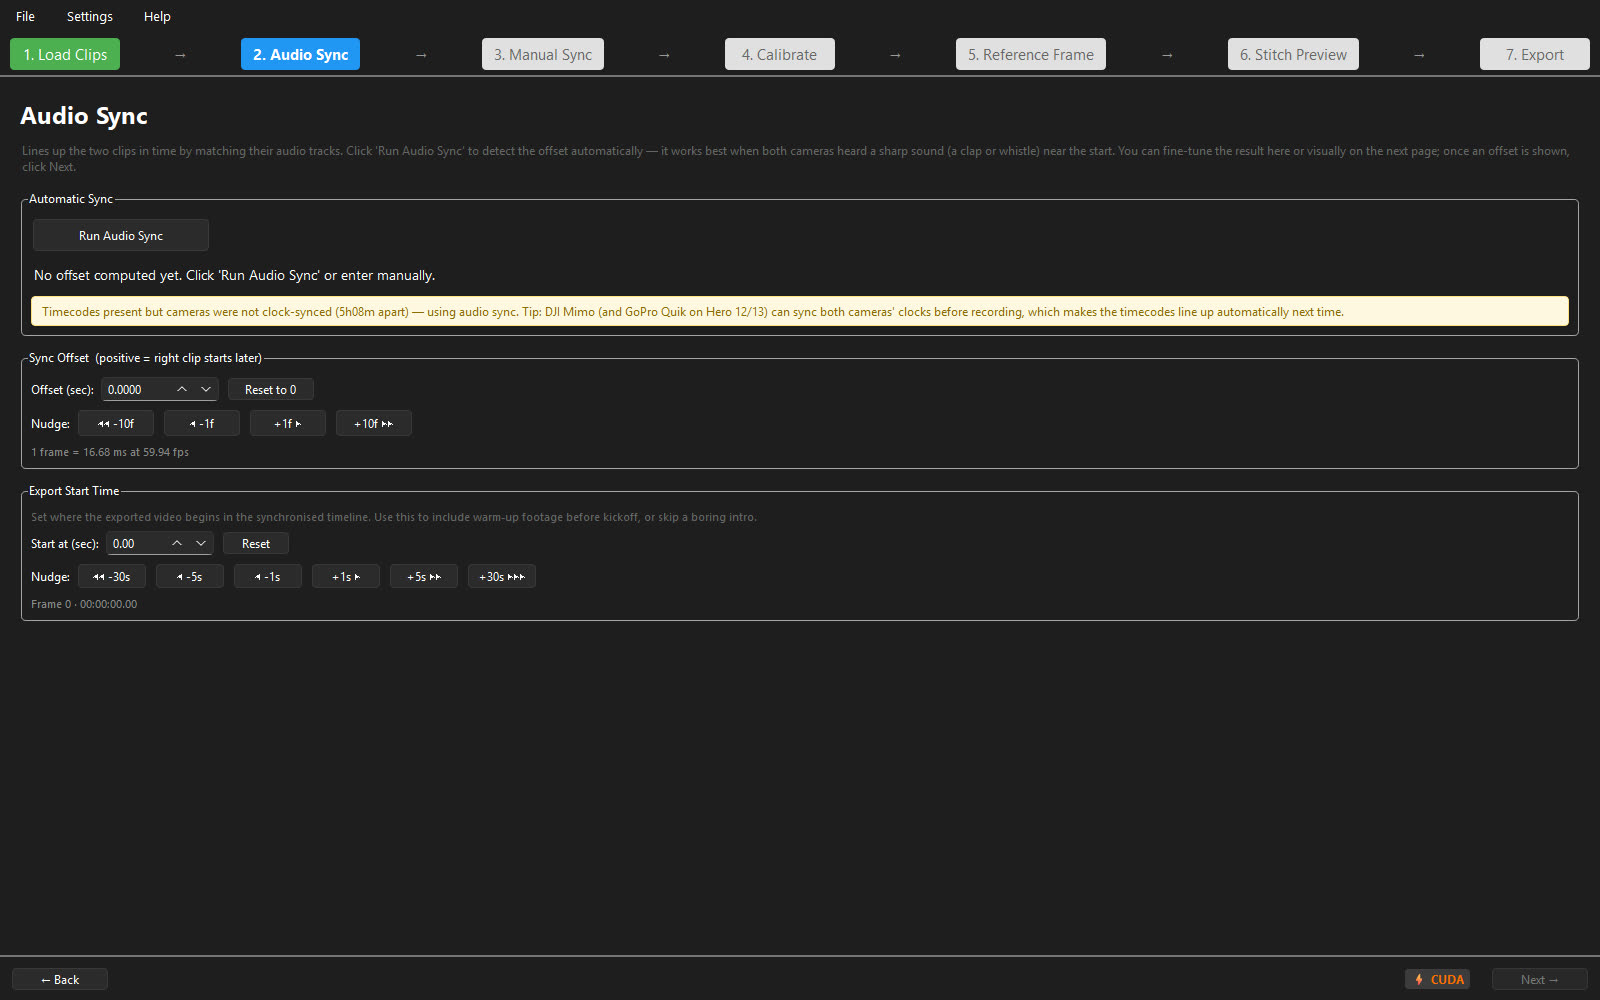
Audio Sync step: clap detection in both audio tracks with a timecode agreement readout
3

Manual Sync

A frame-level nudge for the rare case the automatic offset needs adjusting. Step either clip forward or back one frame at a time while watching a moving subject — when it stops doubling, you’re synced. Most sessions skip straight past this page.
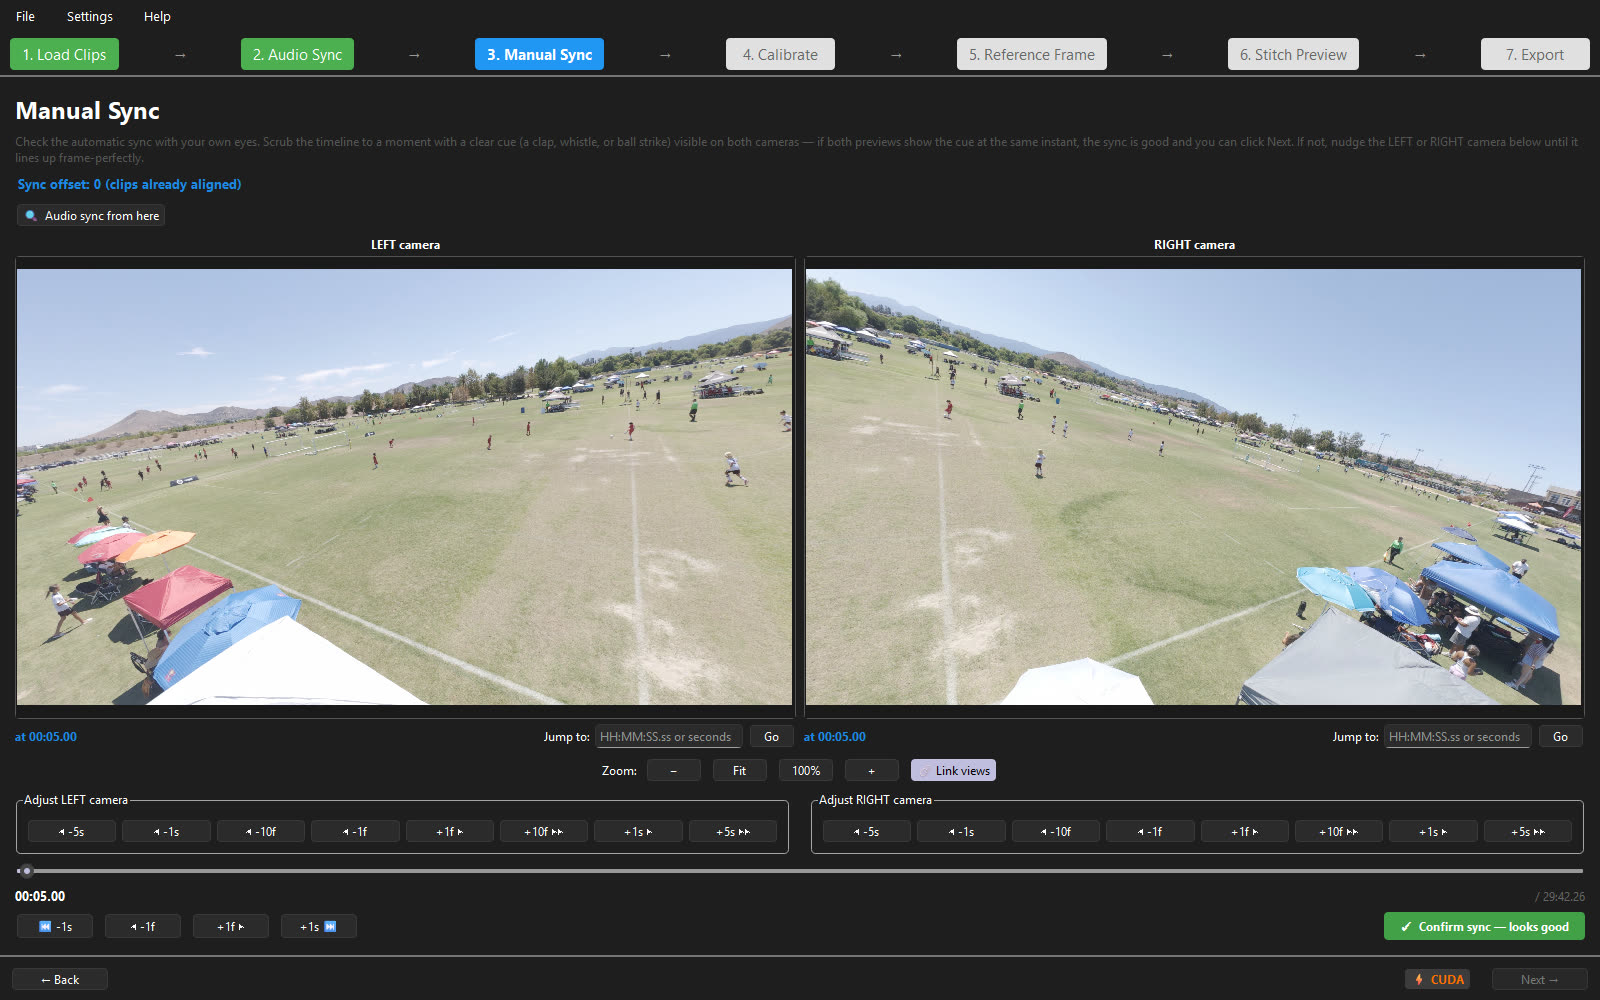
Manual Sync step: frame-by-frame nudge controls for fine-tuning the sync offset
4

Calibrate

Tell the app what lens shot each clip. Presets cover common camera models, so this is usually one dropdown per camera; the profile describes how the lens projects the world, which the stitch needs to undo before aligning the two views.
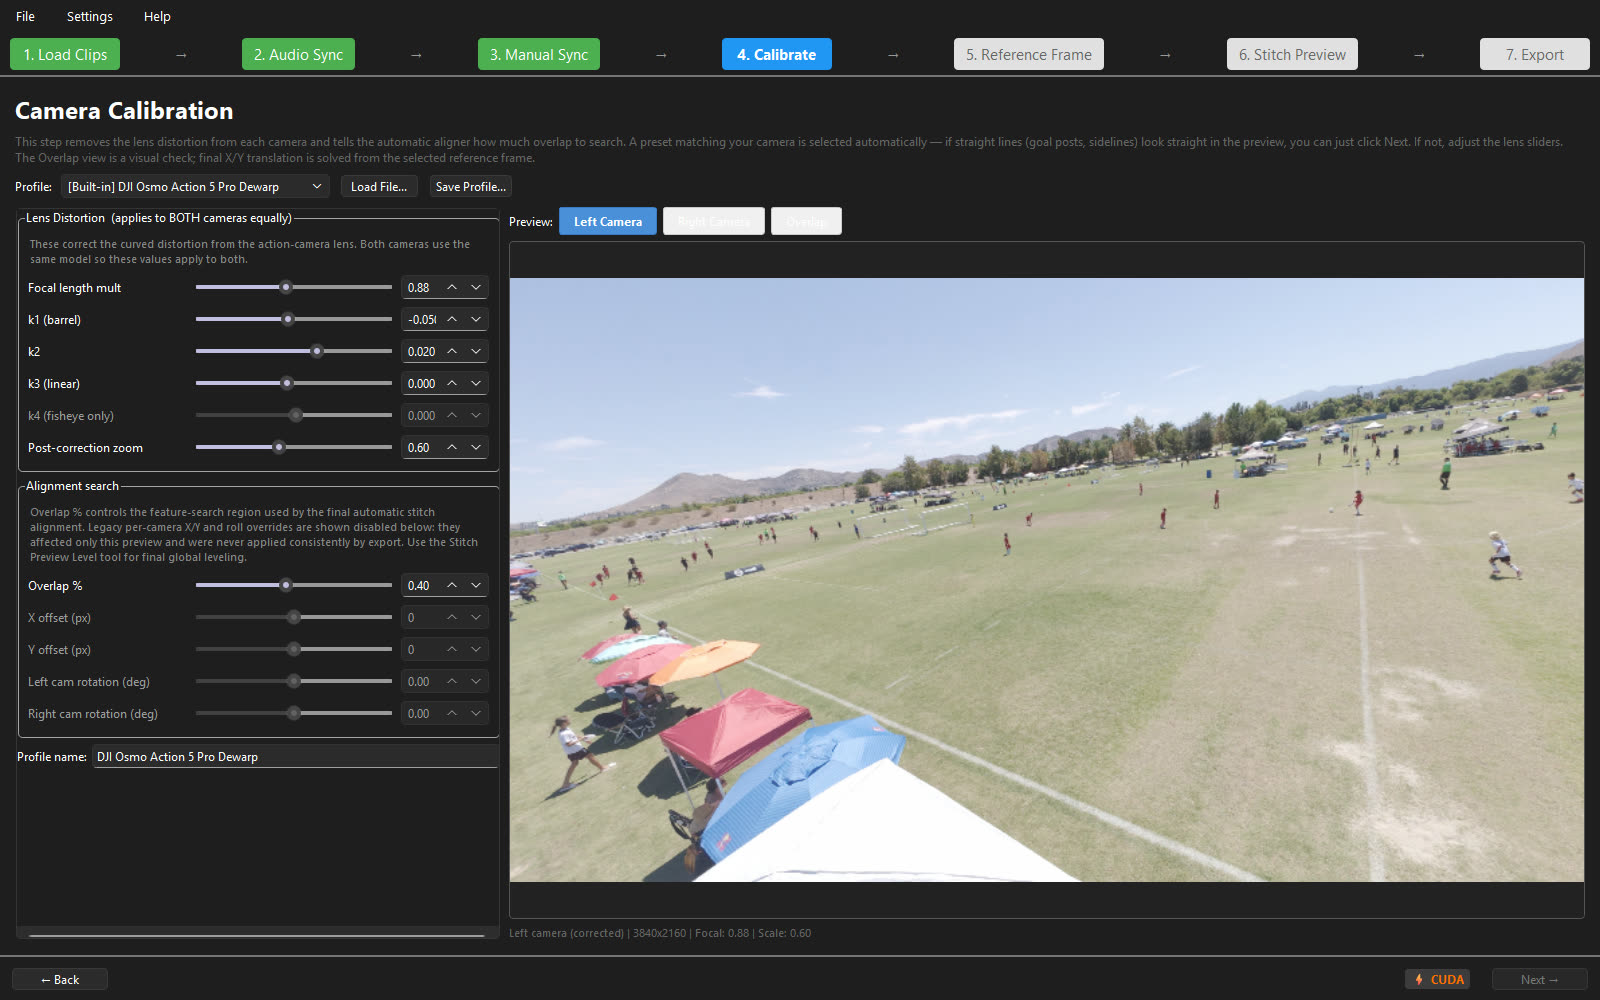
Calibrate step: lens profile selection with per-camera-model presets
5

Reference Frame

Scrub to a frame with action in the overlap zone — players crossing midfield are perfect. This is the frame the alignment solver will study, and texture in the overlap gives it far more to lock onto than empty grass.
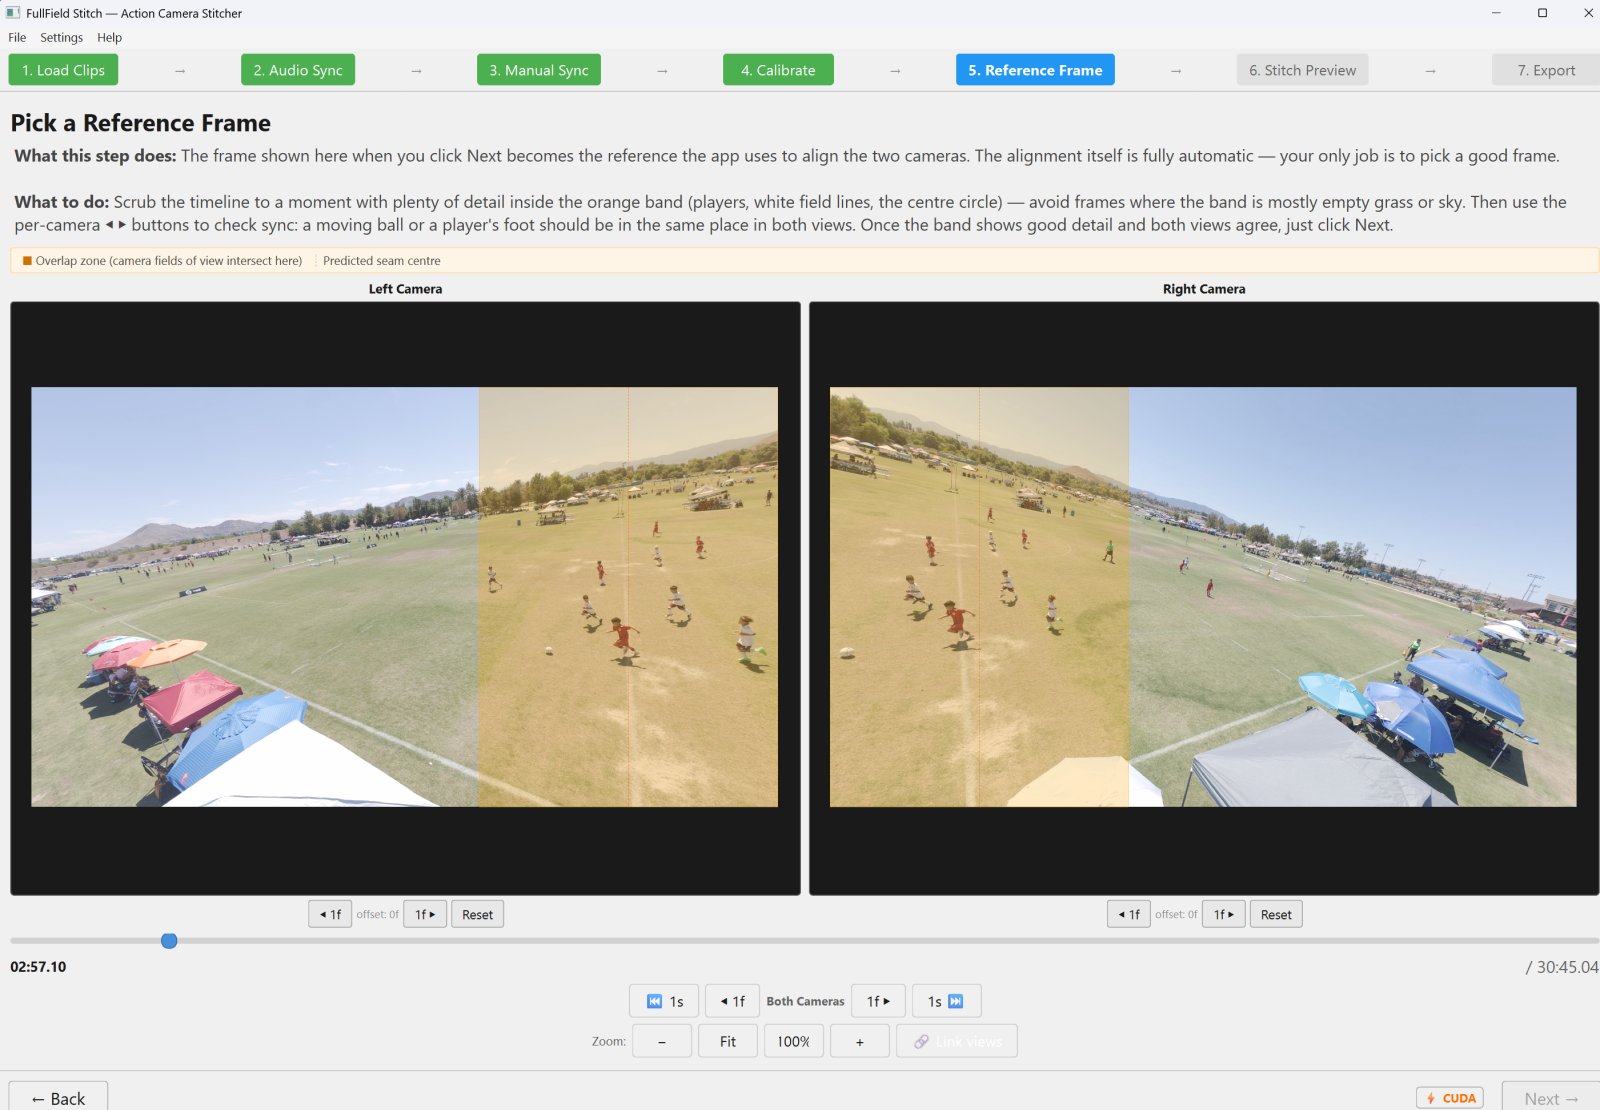
Reference Frame step: scrubbing to a frame with players in the camera overlap zone
6

Stitch Preview

Alignment computes automatically the moment you arrive — focal auto-tune, per-camera lens variance, and per-row correction all run without a button press, and a PASS/FAIL strip tells you whether the result is trustworthy. Drag the Level tool along the goal bases to square the horizon, then set the seam and crop. Good looks like: PASS on the strip and no doubled players at the seam.
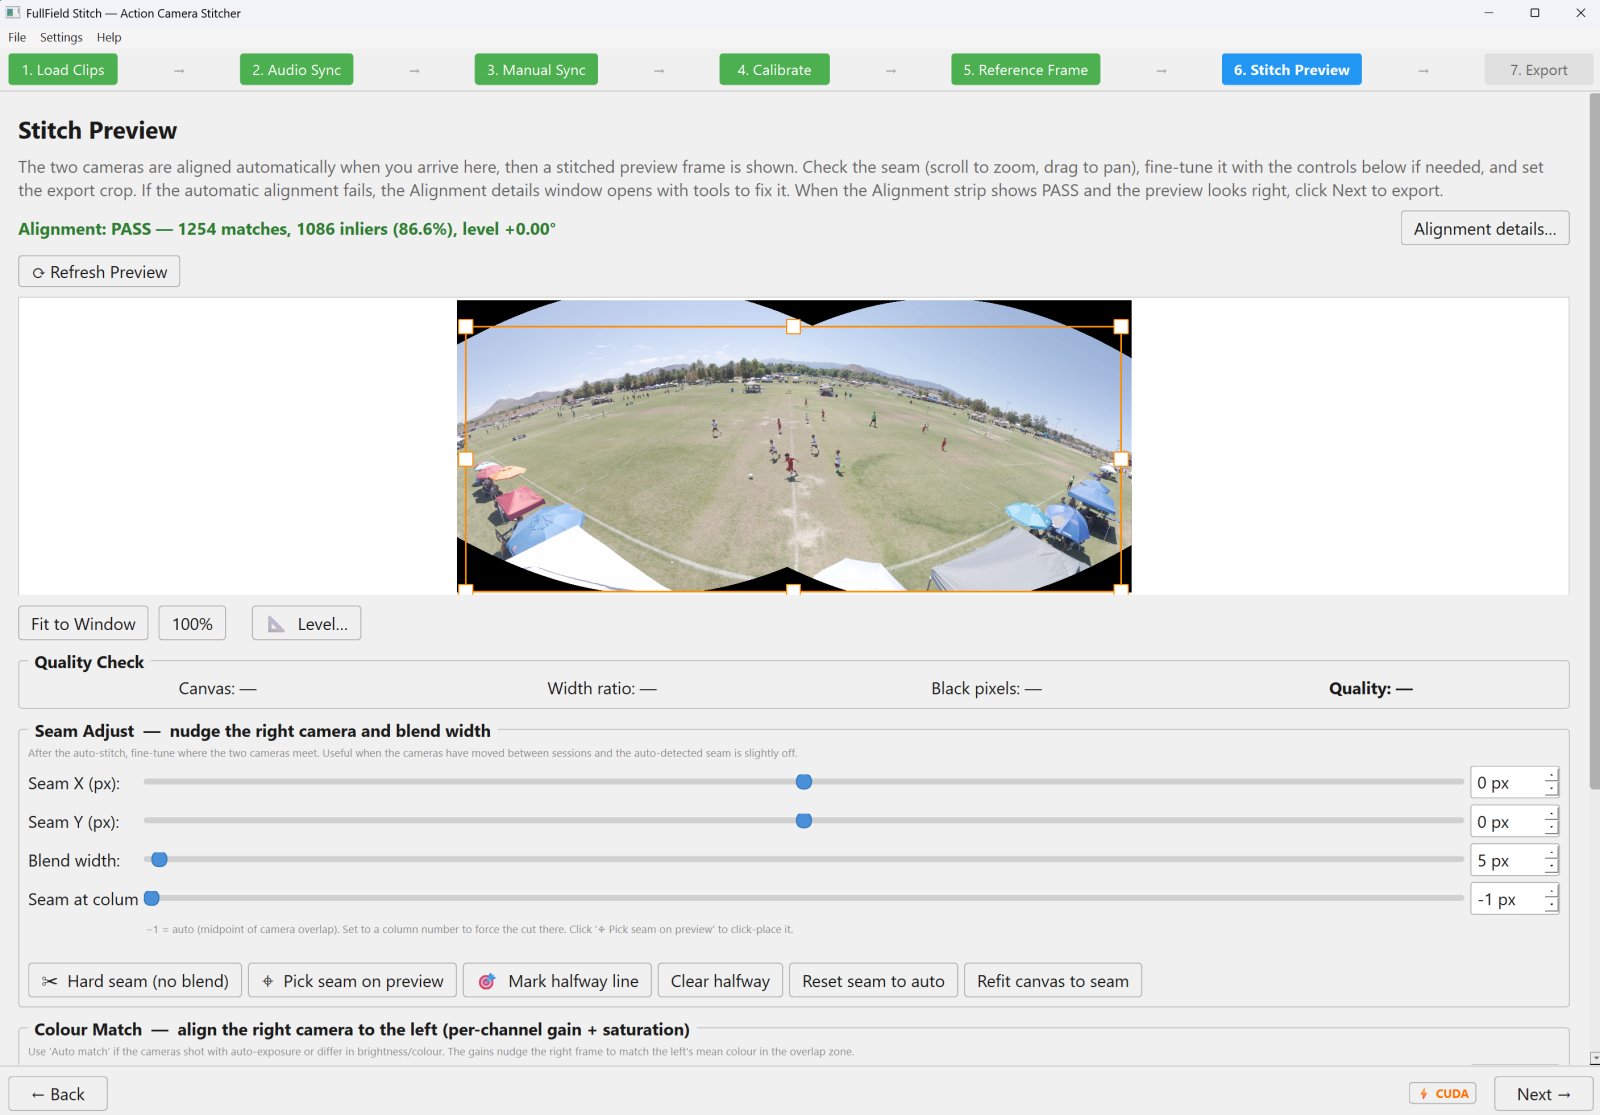
Stitch Preview step: automatic alignment with PASS/FAIL status strip, Level tool, and seam controls
7

Export

The full render: pick the encoder (NVENC on NVIDIA cards), confirm the auto-recommended LUT, choose how many parallel workers to run, and go. Every export also appends a record to your local benchmark log — the same numbers behind the benchmarks page.
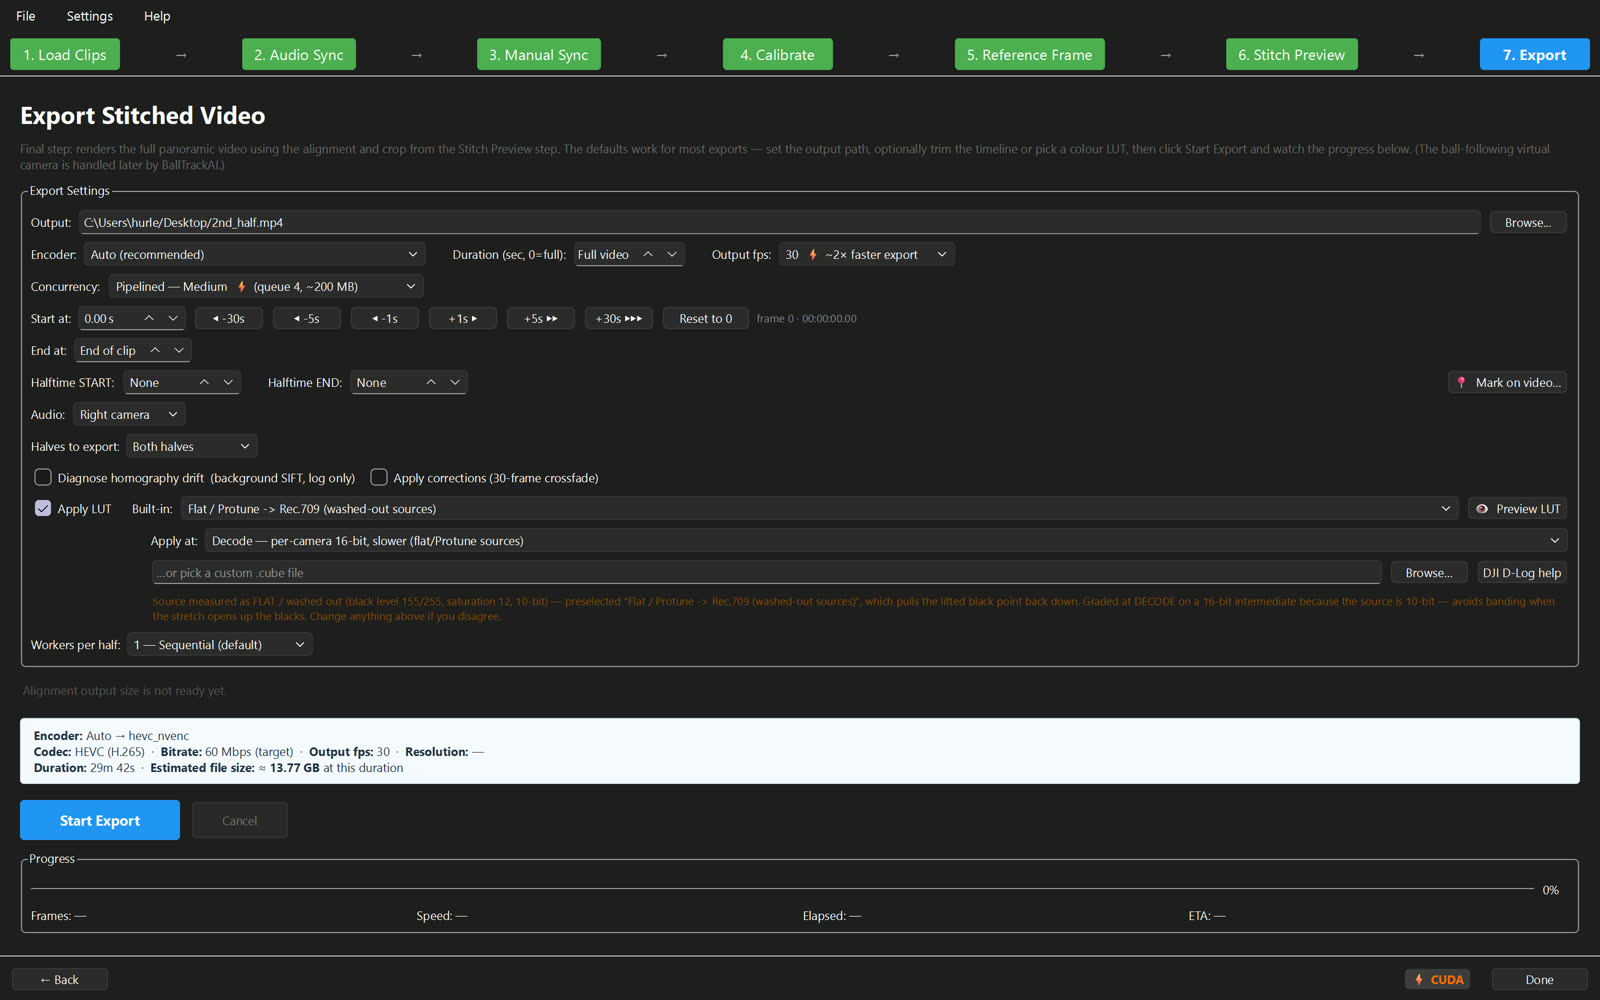
Export step: encoder selection, LUT recommendation, and worker count for the final render

See it work

The same 30 seconds, three ways: the two camera files in, the stitched panorama out.

Left camera — covers the left half of the field. This is the file straight off the camera: 10-bit, flat log-style profile, washed out on purpose.

Right camera — covers the right half of the field, in the same flat profile. The color comes back later, in the export.

The stitched result — the same 40 seconds. About half of each camera’s view overlaps the other’s; the app aligns the two and blends them along a single seam, and the built-in LUT grades the flat log sources back to natural color in the same export pass — two washed-out half-field clips in, one continuous graded panorama out. These are sync-verified excerpts from a real session, downscaled only for this page.

An honest look at the seam

Every two-camera stitch has a seam. Most products crop past it in their marketing; here’s ours up close, with the measurements that shaped how the app handles it.

A narrow feather beats a wide blend

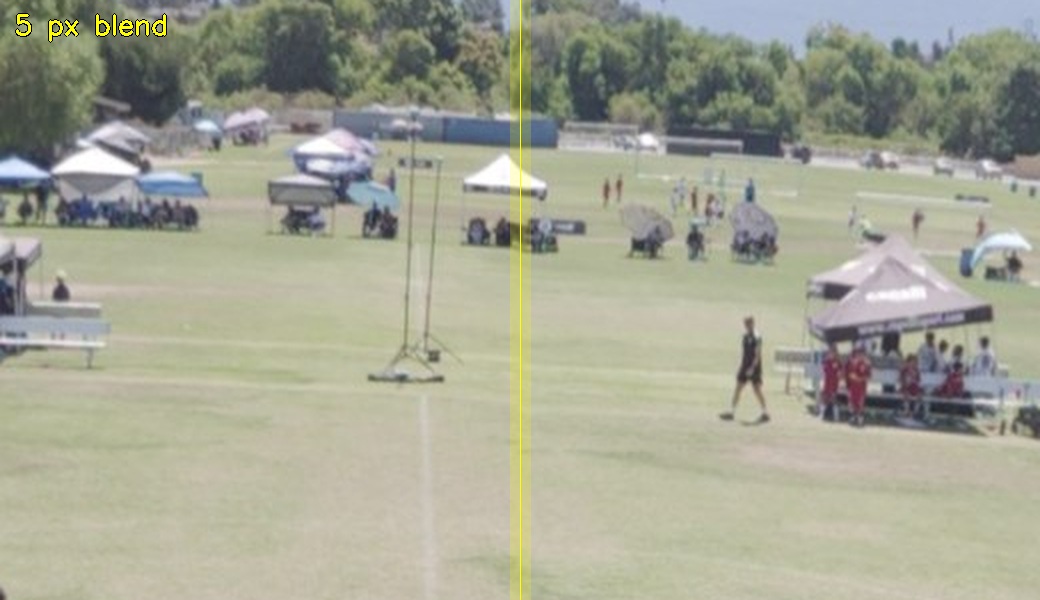
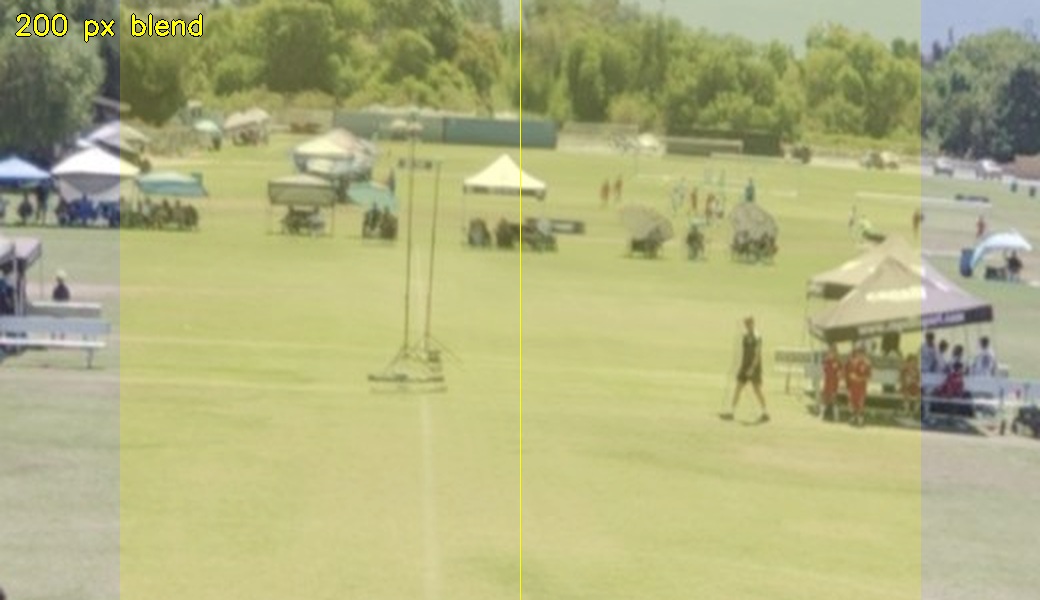
The “5 px” you’ll see in the app is a feather width — how wide the strip is where the two cameras mix — not an alignment tolerance. A wide feather sounds safer, but it visibly ghosts anything that moves: at 200 px, tent poles and people double up. At 5 px the mix zone is narrower than the residual misalignment, so moving subjects stay sharp.

Seam close-up with a 5-pixel feather: edges and people stay sharp

5 px feather — the seam strip is too narrow to double anything.

Seam close-up with a 200-pixel feather: tent poles and people are visibly doubled

200 px feather — the wide mix zone ghosts tent poles and people.

Two identical cameras aren’t identical

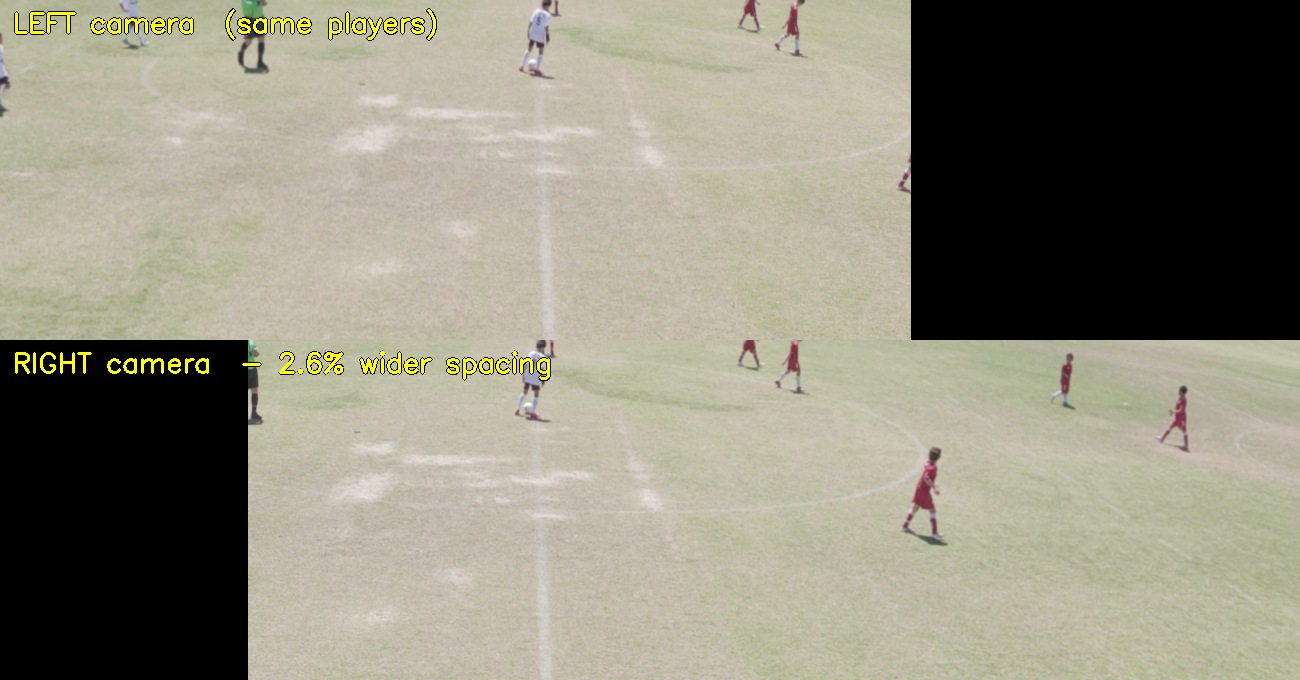
Two same-model bodies on identical settings measured a ~2.6% effective scale difference — the same players, at the same instant, are visibly larger in one camera. You’d never notice it in either camera alone; at the seam it’s fatal. The app now solves this automatically at calibration: a shared-focal auto-tune, then a per-camera focal ratio, then a per-row correction.

Side-by-side crops from both cameras at the same instant: the same players appear visibly larger in one camera

Same players, same instant, both cameras — one image is measurably larger. This is lens variance between two identical-model bodies.

The numbers — and what remains

With that correction in place, seam misalignment on real footage went from 11.4 px to 1.1–2.3 px — measured solver-blind, on held-out frames the solver never saw. On the pitch itself that is now hard to find: in the clip below the halfway line runs straight through the crossover and players cross it without doubling.

What remains is depth. Two lenses a few centimeters apart see close and distant objects from different angles, and a single alignment cannot satisfy every depth at once — so the app fits the one that matters, the ground plane you actually film. Look at the mountain ridge along the top of the clip and you can still catch a small step where the two views meet: that is the residual, parked on scenery kilometres away instead of on the players.

The seam, unhidden — a real 30-second clip centered on the crossover, distant ridge to near touchline. The field lines and the players hold; the small step left in the far ridge is parallax physics, not a bug we’re hiding.

Getting the best seam you can

  • Get the lenses closer. Parallax scales with lens separation — the upside-down mount exists purely to shrink it
  • Clock-sync the cameras and clap anyway — a sync error doubles every moving subject across the whole frame, which looks like a seam problem but isn’t one
  • Follow the recording checklist above — stabilization off and locked identical settings are what keep a good calibration good for the whole match

A master, not a deliverable

The panorama isn’t the video you share — it’s the source you cut everything else from.

Feeding BallTrack AI?

Render at native resolution and maximum quality — every pixel you discard is ball-detection recall you can’t get back. The tracker reads the master once; give it everything the cameras captured. A sample master from two 4K clips measured 4504×2032 HEVC at 45 Mbps.

Watching it yourself?

Pick whatever size suits your screen and bandwidth, then use the built-in Crop tool to frame the part of the field you care about. Because you cropped from a full-quality master, you can always come back and cut a different view — nothing was thrown away at export time.

Ready to stitch your own matches?

The beta is free, everything runs on your machine, and the performance numbers are public.